Advanced 3D Optical Profiler using Grasshopper3 USB3 Vision camera
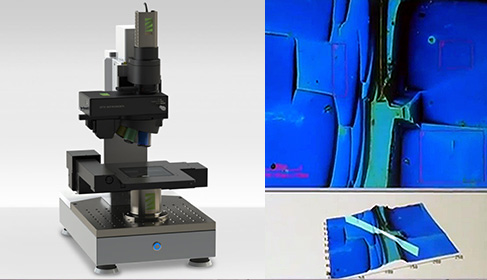
Figure 1. The Zeta-20 uses the Grasshopper3 and produces true color 3D optical images with multi mode optics technology
3D optical profiling provides a combination of imaging, precise measurement and speed which is not possible with contact techniques such as stylus profilers or atomic force microscopes (AFMs). 3D optical profilers are used for a variety of measurements, including sub-micron to multi-millimeter step heights and nanometer level surface roughness.
Optical profilers are typically built on advanced optical microscopes, providing the dual advantage of excellent imaging and no contact with the surface being measured. They use a variety of light sources, usually using high-brightness LEDs, to illuminate the sample and sophisticated cameras to capture the images which are then converted into height information using techniques such as confocal microscopy or interferometry.
Optical profilers are presently being deployed in many high-technology industries where the surface properties of materials need to be analyzed, such as the characterization of advanced semiconductor packaging, high-brightness LEDs, solar panels and microfluidic devices.

Figure 2. Zeta-20 and image sample
Improvements in image capture enable new techniques and lower costs
One such optical profiler -- the Zeta-20 -- was recently launched by Zeta Instruments (San Jose, CA). The Zeta-20 is built on a new, patented optical technique called ZDot™, which enables it to capture and analyze images of difficult to measure surfaces in a way that is not possible with traditional techniques such as interferometry or laser confocal microscopy. These include surfaces which are transparent and multi-layer, those that have low reflectivity and low-contrast, or those with high roughness.
The Zeta-20 optical profiler itself sports a solid optical base plate with threaded holes that gives flexibility to the user to place any sample to be analyzed under a choice of objective lenses. Using lenses with different magnification, users can immediately see the effect on the field of view of the sample captured by the instrument. More importantly, they can also visualize the depth of focus which changes with the numerical aperture of the actual objective that is used.
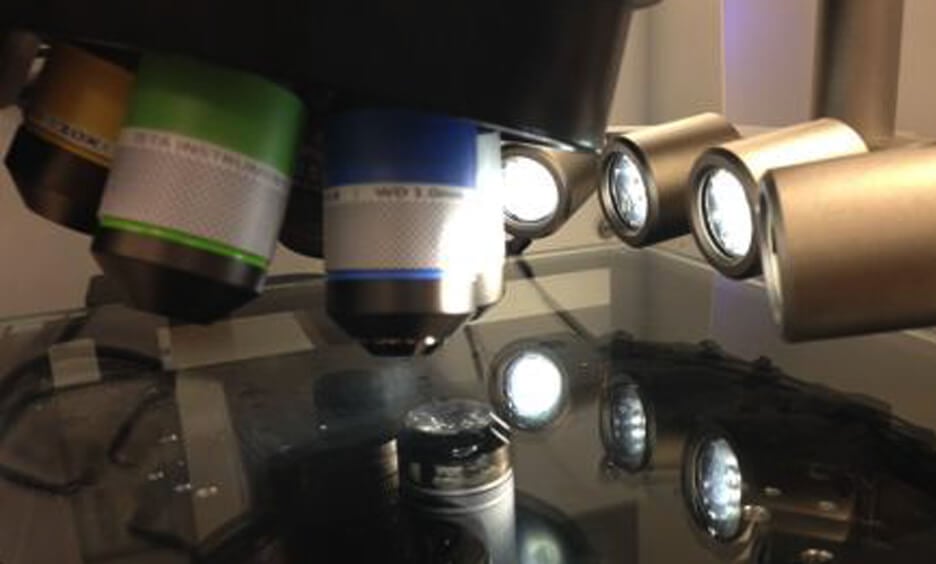
To create a 3D image of a sample, it is illuminated by a high intensity white light LED source to preserve its color. The relative distance between the sample and the objective lens chosen by the user is then moved under PC control through a number of pre-determined steps by a precision closed loop z-drive fitted with rotary and linear encoders. 
Figure 3. High intensity white light LEDs preserve the color of the sample
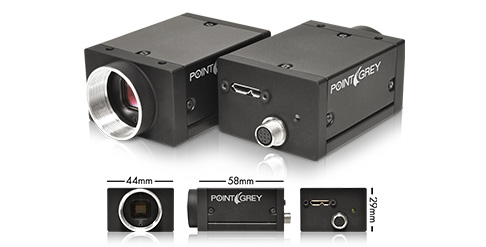
At each step, a pattern of dots created by a custom built electronic pattern generator is projected onto the focal plane of the objective lens and an image is captured of the sample by a FLIR Grasshopper3 GS3-U3-28S5C 2.8Mpixel color camera. The pattern is then removed from the focal plane of the instrument and a second image of the sample is captured by the camera.
Both sets of images captured at each step are then transferred to a PC over a USB3 Vision interface where a proprietary software algorithm analyzes the images to create a true color 3D image and a 2D composite image of the sample. Because the system determines when the pattern of dots is in focus on the sample, it is then implicit that the sample itself will also be in focus. The method enables reliable and accurate 3-D imaging on almost any sample regardless of its image contrast.

Figure 4. Grasshopper3, Sony ICX674 CCD, 2/3", 4.54 µm, 1920 x 1440 at 26 FPS
According to Ken Lee, VP Special Projects at Zeta Instruments, the FLIR camera is an important building-block in the Zeta-20 3D optical profiling system. “Working in conjunction with our patented ZDot pattern generator, the camera enables images of samples to be captured by the instrument at a resolution of 1920 x 1440 pixels, enabling our customers to be able to view features in their samples at a spatial resolution of less than 0.5 microns,” he said.
Software analysis
Once the 3D image of the sample has been captured by the optical profiler, a Windows-based software package presents the user with 3D images of the sample, a 2D composite image and a window in which the results of analyzing the sample using the tools found in the software package can be viewed on screen. The analysis tools allow step height measurements on the sample surface to be made, as well as the difference in average height between two locations on the sample surface.
Most importantly, the software can also determine the surface roughness of the sample material. Surface roughness is an important parameter for evaluating the surfaces of materials, because it affects their properties. Not only does it affect the direction of light scattered from optical devices, it is also key to understanding the friction of mechanical components.

Figure 5. The Zeta-20 is capable of measuring multiple dimensions, inlcuding 2D and 3D roughness, marco-AFM and micro-CMM, film thickness, step heights, wall angles and more
Because the Zeta 3D optical profiler is capable of taking multiple measurements on almost any surface, it is insensitive to vibration and enables measurements not possible with interferometers or confocal microscopes. As such, it has been widely adopted at many leading R&D labs and universities such as NIST, the Fraunhofer Institute, MIT, Yale and Purdue as well as at manufacturing facilities in global semiconductor, LED and solar companies.
About Zeta
Zeta Instruments designs, manufactures, sells and services Multi-Mode optical profilers and defect inspection systems for multiple high-technology industries, including: advanced semiconductor packaging, high-brightness LEDs, advanced glass manufacturing, solar, microfluidics and data storage. Zeta has delivered consistent growth and has installed over 2000 systems in 20 countries. Its locations include headquarters in San Jose, CA, a regional office in Shanghai, China, and sales and service representatives worldwide.
Images courtesy of Zeta Instruments.